 how-to
Best Way to Fix Leaks: 4 Repairs That Hold
Table of Contents
- The Best Way to Fix Leaks Depends on the Pipe
- Step 1: How to Shut Off the Main Water Valve
- Step 2: Find the Leak Source and Check the Damage
- Step 3: Build an Emergency Pipe Repair Kit
- Step 4: Apply the Repair by Pipe Material
- Monitor the Patch and Prevent Future Leaks
- When to Call an Emergency Plumber
- Conclusion: Choose the Right Fix for a Leak That Lasts
- Frequently Asked Questions
Last Updated: September 7, 2026
The Best Way to Fix Leaks Depends on the Pipe
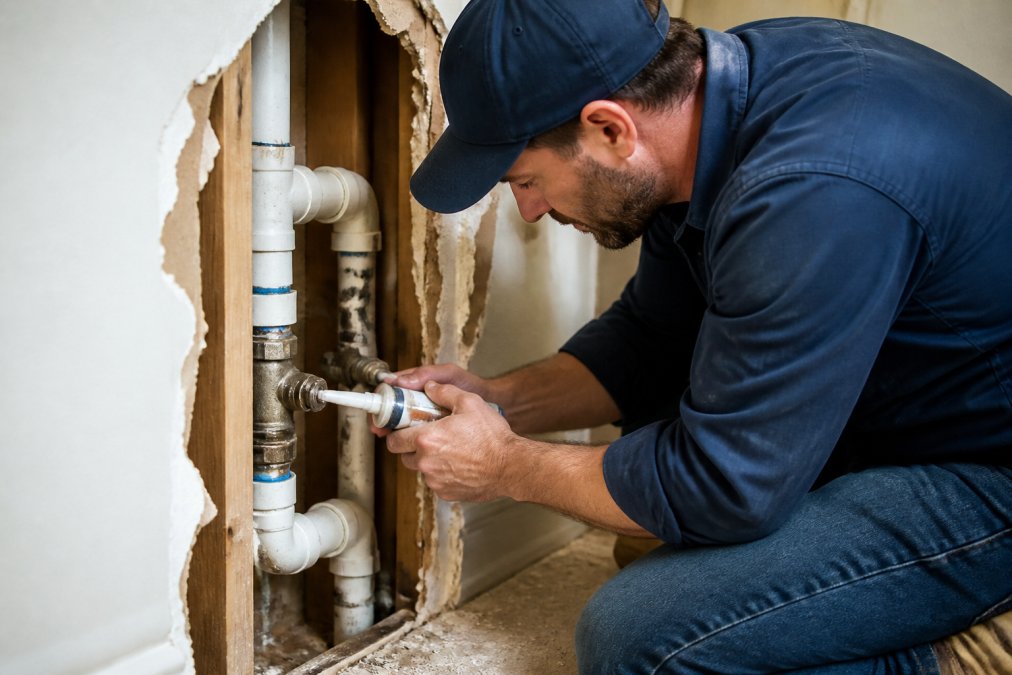
A dripping pipe joint or a pinhole spray can ruin drywall, warp flooring, and spike your water bill before you even locate the source. The best way to fix leaks is a decision process: shut off the water, identify the pipe material, and match the repair to the damage. This guide focuses on material-specific repairs that actually hold.
Most emergency leaks fall into two categories: pinhole corrosion on straight pipe runs and failures at joint connections. Choosing the wrong product for the pipe material is the most common DIY error.
Step 1: How to Shut Off the Main Water Valve
Before any repair begins, stop the water flow at the source. The main shut-off valve is typically located where the municipal water line enters the house, often near the water meter in the basement, crawl space, or garage.
Locate the valve now and confirm it turns freely; a seized valve during a burst pipe is the worst possible timing.
For most homes, the main valve is a gate valve (a round wheel) or a ball valve (a lever handle). Turn the wheel clockwise, or rotate the lever a quarter turn until perpendicular to the pipe. Then open a faucet on the lowest floor to drain residual water.
Step 2: Find the Leak Source and Check the Damage
Once the water is off, dry the pipe and trace the leak to its exact point. A leak at a joint often runs down the pipe, so the visible drip may be several inches from the actual breach.
A pinhole or hairline crack on a straight section is a good candidate for epoxy or a repair clamp. A split fitting, heavily corroded pipe, or failed soldered joint indicates a larger structural problem. If the pipe feels soft or flakes when touched, a patch will fail.
Measure the pipe diameter before buying repair materials. Most residential supply lines are 1/2-inch or 3/4-inch, but drain lines are larger. The pipe diameter dictates the clamp size and the amount of epoxy putty you will need.
Step 3: Build an Emergency Pipe Repair Kit
A stocked emergency pipe repair kit turns a stressful leak into a manageable task. Hardware stores are closed during many plumbing emergencies, so assemble this kit now.
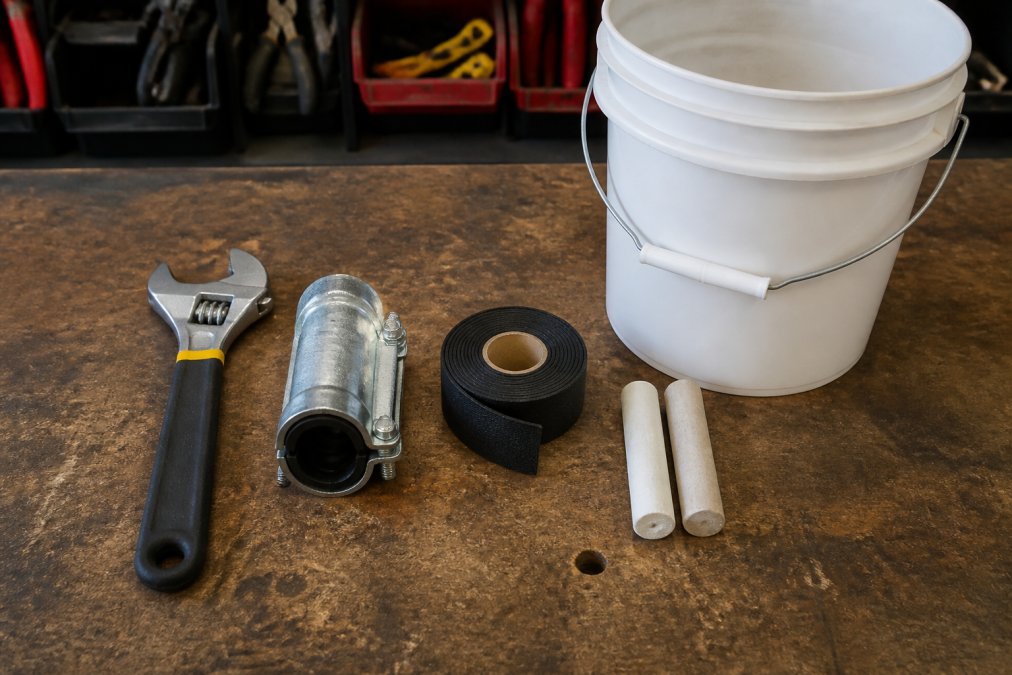
A basic kit includes epoxy putty, self-fusing silicone tape, a pipe repair clamp, an adjustable wrench, a wire brush, and a bucket. For threaded connections, add Teflon pipe tape. This collection handles most pinhole leaks, small cracks, and weeping joints you will encounter.
Epoxy Putty vs. Self-Fusing Tape vs. Repair Clamps
Each tool has a specific job. Epoxy putty cures into a hard, permanent plug, working best on small holes and cracks in dry, clean pipe. Self-fusing tape bonds to itself to form a watertight rubber seal, ideal for irregular surfaces. A pipe repair clamp uses a gasket and metal band to create a compression seal, the most reliable option for larger holes.
| Repair Material | Best For | Cure/Install Time | Permanent? |
|---|---|---|---|
| Epoxy Putty | Pinholes, small cracks | 10-30 minutes | Yes, if pipe is sound |
| Self-Fusing Tape | Irregular surfaces, minor weeping | Immediate | Temporary |
| Repair Clamp | Larger holes, splits | 5 minutes | Yes, with gasket kit |
| Teflon Tape | Threaded joint connections | Immediate | Yes, on threads |
Step 4: Apply the Repair by Pipe Material
The pipe material determines which repair method will create a lasting seal. Copper, PVC, PEX, and threaded steel each behave differently under pressure and temperature. PEX (cross-linked polyethylene) now accounts for the majority of new residential supply plumbing in the U.S., yet most generic guides ignore it (plasticpipe.org).
Copper Pipe Repairs
For a pinhole leak in a straight run of copper, clean the area with a wire brush and dry the pipe completely; most sealing compounds will not bond to a wet surface.
Knead the epoxy putty until uniform in color, then press it firmly into the hole, extending it slightly beyond the damaged area. For a larger hole, position the rubber gasket from a repair clamp over the leak and tighten the bolts evenly.
A common pattern on copper is pinhole leaks from acidic water (pH below 6.5) eroding the pipe wall from inside (gov.uk). Multiple pinholes indicate systemic corrosion; the correct fix is replacing the affected section or installing a whole-house acid neutralizer.
PVC Pipe Repairs
PVC leaks are almost always at glued joints that failed due to improper primer application or at cracks from freezing. For a crack on a straight run, apply epoxy putty rated for PVC. For a failed joint, cut out the joint and couple in a new section using PVC primer and cement.
PVC becomes brittle with UV exposure. If the pipe shows discoloration or crazing (fine surface cracks) from direct sunlight, the material has degraded and any patch will be temporary.
PEX Pipe Repairs (The Missing Guide)
PEX is flexible, color-coded (red for hot, blue for cold), and expands rather than bursts when frozen, but it still leaks. The most common failure points are at crimp rings or cinch clamps at fittings, not on straight pipe runs. A leaking PEX fitting is almost never patchable with epoxy or tape because the leak is a mechanical connection failure.
The correct repair for a failed PEX crimp connection requires a PEX crimp tool, a new crimp ring, and a new fitting. The process is:
- Shut off the water and drain the line.
- Cut out the failed fitting with a PEX cutter, leaving clean, square ends.
- Slide a new crimp ring over the pipe end.
- Insert the new barbed fitting (or use a push-to-connect fitting like SharkBite for a tool-free option).
- Position the crimp ring over the barb and compress it with the crimp tool.
Push-to-connect fittings are the DIY-friendly exception. A SharkBite or similar fitting presses onto a clean, square-cut PEX, copper, or CPVC pipe end without soldering, gluing, or crimping. They are rated for behind-wall installation in most jurisdictions and are a legitimate permanent repair when installed per the manufacturer’s instructions. The trade-off is cost, roughly $8-$15 versus $1-$2 for a crimp fitting, but the tool investment is zero.
Threaded Joint Connections
Leaks at threaded joint connections are usually caused by failed Teflon tape or pipe dope, not a broken pipe. To fix a leaking threaded fitting, disassemble the joint using two wrenches to loosen it without twisting the pipe.
Tap to easily schedule service today! →
Clean the old tape and debris from the threads with a wire brush. Wrap new Teflon pipe tape clockwise around the male threads, overlapping each wrap by half the tape’s width, and apply three to five full wraps. Reassemble and tighten firmly. This repair is permanent if the threads are undamaged.
For steel pipe threads, consider pipe thread sealant (pipe dope) instead of tape, it fills deeper thread irregularities and is preferred for gas and high-pressure water lines. Apply it with a brush to the male threads, then assemble immediately.
Material Selection Quick Reference
| Pipe Material | Most Common Leak Point | Best Repair Method | Permanent? |
|---|---|---|---|
| Copper | Pinhole on straight run | Epoxy putty or repair clamp | Yes, if pipe wall is sound |
| Copper | Failed soldered joint | Cut out and re-solder, or push-to-connect coupling | Yes |
| PVC | Crack from freeze or UV | Epoxy putty (small) or cut-and-couple (large) | Yes, if pipe is sound |
| PVC | Failed glued joint | Cut out and re-glue with primer and cement | Yes |
| PEX | Crimp ring or fitting failure | Cut out and re-crimp, or push-to-connect fitting | Yes |
| Threaded Steel | Weeping threads | Disassemble, re-tape or dope, reassemble | Yes, if threads are sound |
Monitor the Patch and Prevent Future Leaks
A successful repair requires verification. After applying the fix, turn the main water valve back on slowly and check the repaired area for moisture. Inspect it again after 30 minutes, then after 24 hours. A patch that holds for a day will likely hold, but continue to monitor it for a week.
Post-repair monitoring is the step most homeowners skip, and it is why temporary patches fail silently. Place a dry paper towel under the repaired section and check it daily; any dampness means the repair is failing.
How to Pressure-Test a Repair Without Causing a Secondary Blowout
The biggest mistake after a repair is slamming the main valve fully open. That sends a full-pressure surge, typically 50-70 psi, directly at your fresh patch, which can dislodge it if not fully cured or seated.
Follow this staged pressurization sequence instead:
- Open the main valve one-quarter turn. Let the line pressurize slowly for 30 seconds. Listen for hissing and feel the repaired area for moisture.
- Open the valve halfway. Wait another 30 seconds. Re-check the repair.
- Open the valve fully. Check the repair again immediately.
- Open the lowest faucet in the house to purge trapped air, then close it. Air pockets create pressure spikes that can stress a fresh patch.
If you have a pressure gauge (available for under $15), attach it to an outdoor spigot or washing machine valve and confirm the system pressure stays below 80 psi. Residential plumbing is designed for 40-80 psi; anything above stresses every joint and is a leading cause of recurring leaks.
The 7-Day Monitoring Protocol
A patch that survives the first hour under full pressure is promising, but not proven. Use this protocol:
- Hour 1: Check for dampness every 15 minutes.
- Day 1: Place a dry paper towel under the repair and leave it overnight.
- Day 3: Check the paper towel. If dry, replace it with a fresh one.
- Day 7: Remove the paper towel and inspect the repair visually. Look for discoloration, weeping, or mineral deposits (white or green crust) forming around the patch edge.
Mineral deposits are the early warning sign. Even a microscopic weep will evaporate and leave behind calcium or copper salts. If you see any crust, the patch is failing, do not wait for a visible drip.
Preventing Future Leaks: Address the Root Cause
Preventing future leaks is easier than fixing them. Pipe corrosion is often caused by water pressure that is too high or by chemical reactions between dissimilar metals. A pressure-reducing valve (PRV) set to 60 psi can protect your entire system. If your gauge reads above 80 psi, a PRV is a worthwhile investment, typically $150-$300 installed.
Regularly inspect exposed pipes for signs of corrosion, and replace any section showing green oxidation on copper or rust on steel before it becomes a leak. For PEX, squeeze crimp rings with pliers, a properly crimped ring will not move.
When to Call an Emergency Plumber
Some leaks exceed the scope of DIY repair. If the pipe is heavily corroded, the leak is inside a wall or ceiling, or your main shut-off valve will not close, you need professional help immediately. Continuing to patch a failing pipe risks significant water damage costs.
A leak behind drywall or under a concrete slab requires electronic leak detection to locate without destructive exploration. Professional services use specialized equipment to find the exact breach, then perform a structural repair that addresses the root cause. The EPA’s Fix a Leak Week resources note that household leaks can waste nearly 10,000 gallons of water per year, making early professional intervention a cost-saving measure.
The cost-benefit analysis comes down to the pipe’s condition. A sound pipe with a pinhole is a DIY win; a corroded pipe with multiple leaks is a replacement job. If unsure, a licensed plumber’s inspection is cheaper than the water damage from a failed patch.
Conclusion: Choose the Right Fix for a Leak That Lasts
The best way to fix leaks is to match the repair to the pipe material and the damage, then verify the fix holds. Epoxy putty and repair clamps handle pinholes on sound pipe, while threaded joints need fresh Teflon tape and proper reassembly. When corrosion has weakened the pipe or the leak is hidden behind walls, call a professional before water damage spreads.
At Rich’s Plumbing Heating & Air Conditioning, our licensed and insured technicians handle emergency repairs with a 60-minute response time and back every job with a 100% satisfaction guarantee. We serve New Jersey homeowners with over 30 years of family-owned experience, and we offer free estimates for most services. Tap to easily schedule service today!
Frequently Asked Questions
What is the fastest way to stop a leaking pipe?
Shut off the main water valve first. Then apply self-fusing silicone tape stretched tightly around the leak point. It bonds to itself and creates a compression seal without adhesive. For pinhole leaks, epoxy putty pressed firmly over the hole works faster. Both are temporary patches. A pipe repair clamp with a rubber gasket is the most secure DIY option and can hold until a plumber makes a permanent repair.
Can I use epoxy putty to fix a leaking pipe permanently?
Epoxy putty is rated as a permanent repair for small pinhole leaks on dry, clean pipes, but it carries real risk. It will not bond to a wet surface or hold under high water pressure. It also fails if the pipe is corroded around the hole. Treat it as a durable temporary fix, then have a licensed plumber inspect the pipe to confirm the pipe integrity is sound.
When should I call an emergency plumber for a leak?
Call an emergency plumber if water is leaking near the electrical panel, the leak is inside a wall or ceiling, or you cannot shut off the main water valve. A burst pipe spraying water, sewage odors, or a leak that returns after patching also requires professional help. If water damage is spreading fast, shut the valve and call a licensed plumber immediately.
Is it safe to use pipe repair tape on pressurized lines?
Self-fusing silicone tape is safe on pressurized lines only when applied correctly and only as a temporary fix. Wrap it tightly in a spiral, overlapping each layer by half the tape width. Extend the wrap a few inches past both sides of the leak. It will not seal a large split or a joint connection under high pressure. Check the patch daily for drips.